
facebook business account setup: This easy-to-follow guide will walk you through the process of creating your account, giving you access to Facebook Ads and helping you boost your marketing efforts. By following these simple steps, you’ll be able to take advantage of all the benefits Facebook Ads has to offer. So, let’s get started!
- The Difference Between Ads Manager and Facebook Business Manager
- Creating Your Business Manager Account: A Step-by-Step Guide
- Connect Pages and Accounts to Your Business Manager
- Linking Your Ads Account to Business Manager
- Understanding Facebook Access in Business Manager
- How to Add Billing Information to Facebook Business Manager
- How to Verify Your Domain in Facebook Business Manager
- Facebook Business Account Setup: Summary
The Difference Between Ads Manager and Facebook Business Manager
Confused about the difference between Facebook Business Manager and Facebook Ads Manager? Don’t worry, you’re not alone. While these two tools may seem similar, they serve different purposes in your marketing strategy.
Let’s break it down. Facebook Ads Manager is where you create and manage your campaigns, audiences, and ads. It’s your go-to tool for building your ad campaigns and tracking their performance.
On the other hand, Facebook Business Manager is your central hub for managing your overall business presence on Facebook. It includes your Facebook page and Instagram account, where customers can interact with your brand online. With Business Manager, you can also connect your Ads Manager, pixels, and payments, making it easier to manage all your Facebook tools in one place.
If you’re serious about using Facebook for your business, setting up a Business Manager account is a must. And don’t worry, it’s a simple process that we’ll walk you through step-by-step. So, let’s get started!
Creating Your Business Manager Account: A Step-by-Step Guide
Ready to take your Facebook marketing to the next level? The first step is creating your Business Manager account. Follow these simple steps to get started:
- Go to business.facebook.com and click on the “Create Account” button. If you’re not already logged into Facebook, you’ll be prompted to do so.
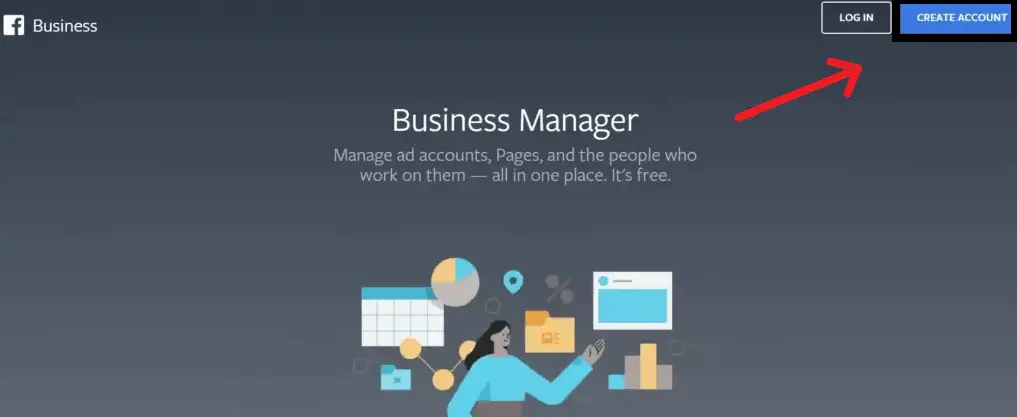
- Click on the blue “Create Business” button to bring up the “Create Your Business Manager Account” popup. Choose a name for your account, and enter your name and email address. Click “Submit” to continue.
- Check your email inbox for a verification email from Facebook. Click on “Confirm Now” to complete the process.
Congratulations, you’ve created your Business Manager account! But there’s more to do to ensure your success. The next step is connecting any existing pages and accounts to your Business Manager. Stay tuned for our next guide on how to do just that.
Connect Pages and Accounts to Your Business Manager
With a Business Manager account, you can simplify the management and analysis of multiple Facebook-related business accounts. Link your Facebook Page, Instagram business account, WhatsApp accounts, and apps to your Business Manager for centralized control.
If you want to manage your Facebook and Instagram accounts in one place, Business Manager is the solution. Here’s how you can add your social media pages and accounts to Business Manager:
Click on the dot menu and go to Business Settings.
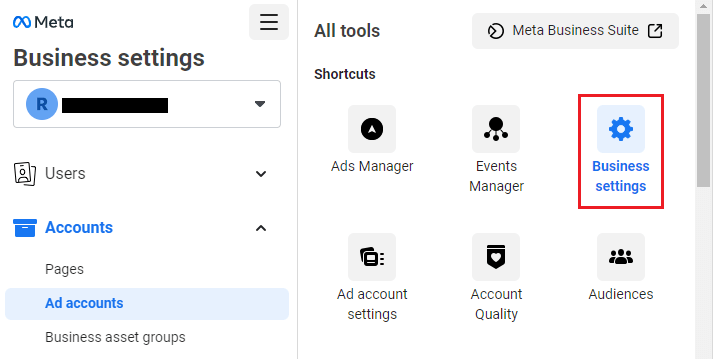
To add a Facebook page, click “accounts”, then click “pages”. You can add a page, request access to a page, or create a new page.
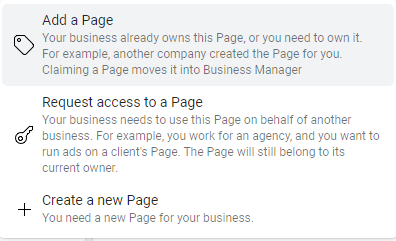
Request Access to a Page is for agencies or freelancers working on behalf of clients.
Create a New Page is for businesses that don’t have a Facebook page yet.
By adding your social media pages and accounts to Business Manager, you can streamline your management process and improve your advertising strategy.
Linking Your Ads Account to Business Manager
Linking your Ads Manager account to Business Manager is just as simple as adding social media pages.
In the sidebar menu, click on Ad Accounts and then select Add. You’ll see three options: Add an Ad Account, Request Access to an Ad Account, and Create a New Ad Account.
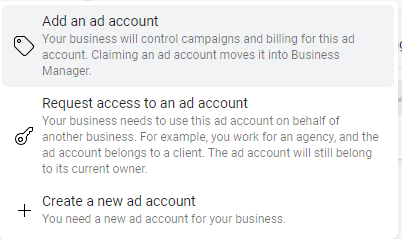
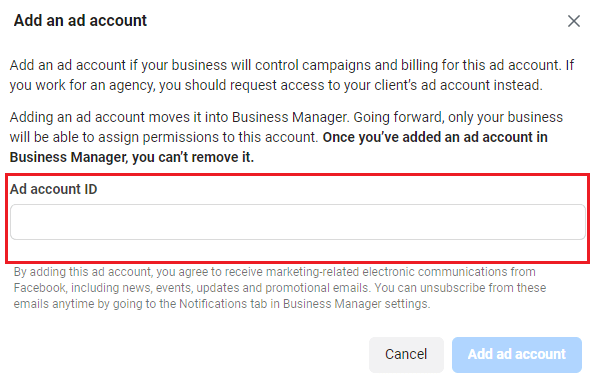
Assuming you already have an Ads Manager account, click Add an Ad Account. The next step is to enter your Ad account ID, which you can find in the URL after campaigns?act= or in the top bar dropdown after your account name in parentheses.
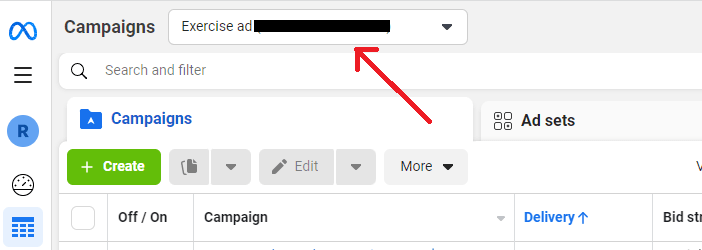
Once you have the Ad account ID, copy and paste it into your Business Manager account and click Add Ad Account. That’s it!
Understanding Facebook Access in Business Manager
Creating a Business Manager account is just the first step. You also need to add yourself as a user to any pages or accounts you’ve connected to your Business Manager account.
Why? Because the accounts are owned by your business, not you personally. Your Business Manager account is separate from your personal account. This means that you can’t make changes on your business profiles, but your business can (even though it’s still you).
Let’s say you want to manage your Facebook Ads account in your Business Manager. You’ll need to add yourself as a user and turn on the Manage Ad Account switch to have full control over the account.
To do this, click on the “Ad Account” option and then click on add people option.
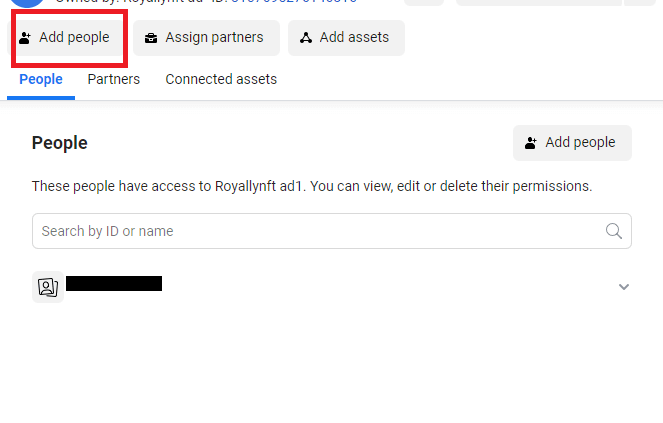
When you click on the “add people” option, the following page will be displayed
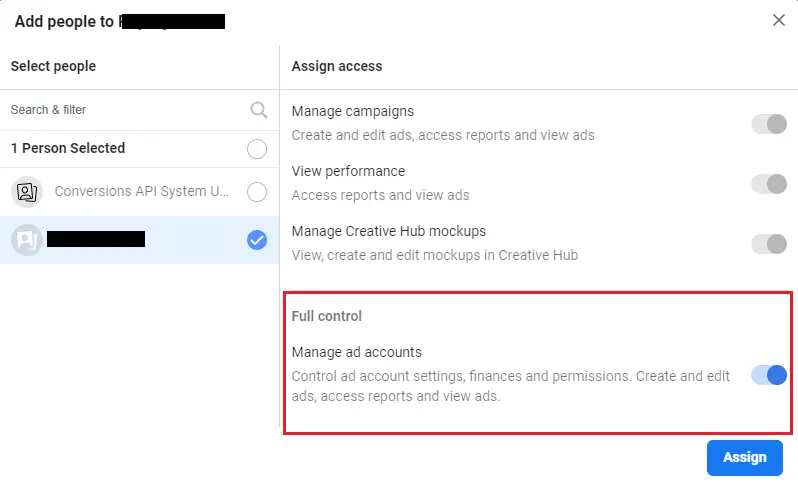
To access full permission and control for this account, first click on your profile located on the left side and then toggle on the “Manage Ad Account” switch on the right.
Keep in mind that you’ll need to add yourself (and any other team members or clients who need access) to each account, even if you’re the owner.
Fortunately, adding users and setting permissions is easy. You can set different permission levels to give certain access to teammates, clients, or freelancers. You can even provide view-only access if you’re getting an audit from a consultant.
Remember, your Business Manager and personal profile are different entities. When you add a user to your Ad account in your Business Manager, you also need to give access to the ad account where you create campaigns, publish ad sets, and create ads.
How to Add Billing Information to Facebook Business Manager
If you’re running a business on Facebook, you’ll want to make sure that you have a streamlined way to manage your finances. Fortunately, Facebook Business Manager makes this easy by allowing you to add your billing information directly to your account.
To get started, navigate to the Business Info section in the sidebar menu of your Business Manager account. Here, you’ll need to fill in all of your business details, including your legal business name, address, phone number, website, and tax ID.

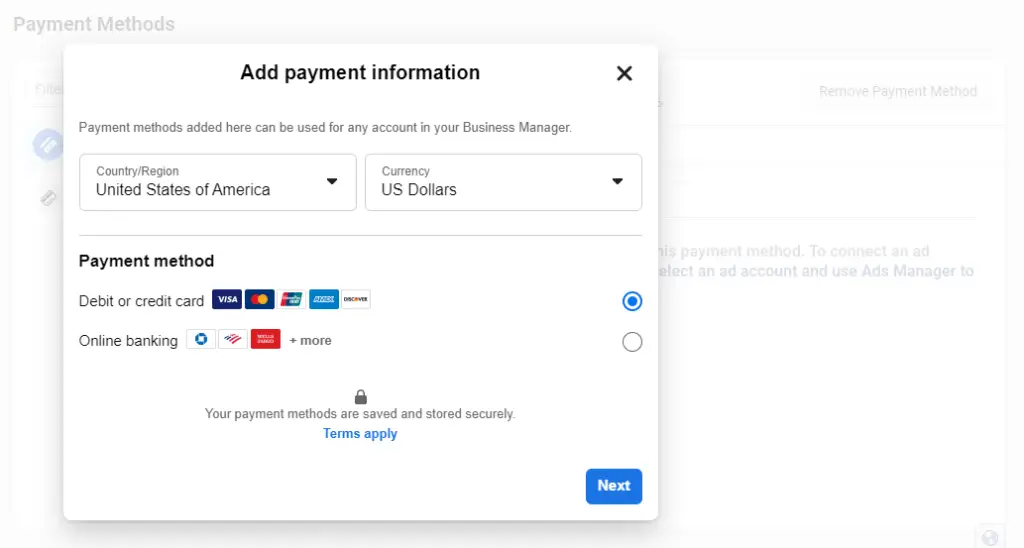
Once you’ve completed your business information, click on the Payment Method menu item and select Add Payment Method. This is where you’ll be able to add your credit card or debit card information to pay for any Facebook transactions.
By adding your billing info to your Facebook Business Manager account, you’ll be able to easily manage all of your financial transactions and streamline your advertising process. So why wait? Add your billing info today and start enjoying the benefits of a fully integrated Facebook business experience.
How to Verify Your Domain in Facebook Business Manager
Once you have set up your Facebook Business Manager account, the next step is to verify your domain. This helps to ensure that you have control over the website associated with your business.
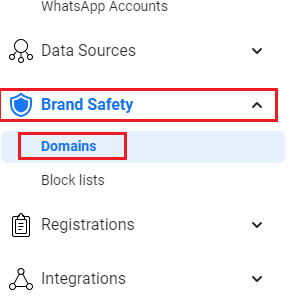
To verify your domain, start by clicking on “Brand Safety” in the sidebar menu of your Facebook Business Manager account. Then, select “Domains” and click “Add.” Enter your website domain and click “Add” again.
The next step is to verify your domain. There are three options for verification: Meta-tag Verification, HTML File Upload, and DNS Verification. We recommend DNS Verification because it’s relatively easy.
Click on the DNS Verification tab and log in to your domain registrar. Go to the DNS records section and add the TXT record provided in Step 2 to your DNS configuration. Some registrars may ask for a Host field, in which case you can use the “@” symbol.
The process may vary slightly depending on your domain registrar. However, you can usually find a helpful guide on your provider’s website or online. The DNS change usually takes up to 72 hours to take effect, but Facebook warns that it may take longer. Once the change is complete, you will see a green circle next to your domain name indicating that it has been verified.
Read also:
- How to become a pro at Social Media Marketing in 2023
- How to Run Quora Ads | Ultimate Guide on Quora Ads
- Clickfunnels vs Shopify 2023 | Which One Is The Best?
- The Ultimate Guide to Advertising on Pinterest
Facebook Business Account Setup: Summary
In this guide, we’ve covered everything you need to know to set up your Facebook Business Manager account. With Business Manager, you can efficiently manage multiple Facebook ads, accounts, and pages, making you a better marketer. It’s also an excellent tool for agencies that manage their clients’ social media accounts or ad accounts.
Now that you’ve set up your account, it’s time to start advertising! To get the most out of your ads and data, make sure to set up conversion tracking. This way, you can replicate successful strategies from your best campaigns.
Have you encountered any challenges while setting up your Facebook Business Manager account? Do you have any other tips or important things to keep in mind when using Business Manager? Let us know in the comments below!


